

/03 Author: Maya S
Getting a playable character into Unreal Engine 5
As we began our search for a suitable workflow to create a playable character for the game-side of our project, we stumbled upon Metahuman. Its immense value lies in its ability to facilitate the creation of custom characters, while providing a range of sophisticated features such as advanced systems and materials. Additionally, Metahuman is seamlessly compatible with Unreal Engine, which makes it even more appealing as a powerful tool for our project.
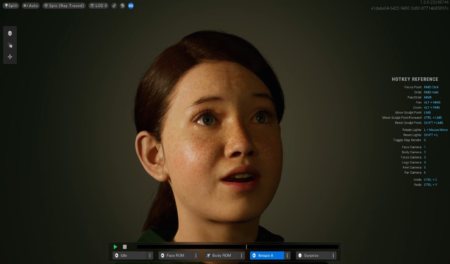
The first step on getting Nina in UE5 as a playable character was to integrate her into Unreal Engine and assign her a range of animations, such as walking, jumping, and other player-controlled movements.
To initiate this process, we aimed to incorporate the native to Unreal Engine walk, run, and jump cycles into Nina’s framework.
Importing Metahuman into Unreal
It is worth noting that previously we imported MetaHumans into Unreal Engine version 5.0.3. Since then, we have upgraded to release 5.1.1, but we can confirm that this particular workflow remains functional within the updated version. To successfully import a MetaHuman into Unreal Engine 5, it is essential to have the Bridge plugin installed in your project, as well as several additional plug-ins, such as Live Link and the Apple ARKit Face Support plug-in.
However, with the exception of Bridge, Unreal Engine automatically activates the required plug-ins while importing Metahuman assets.
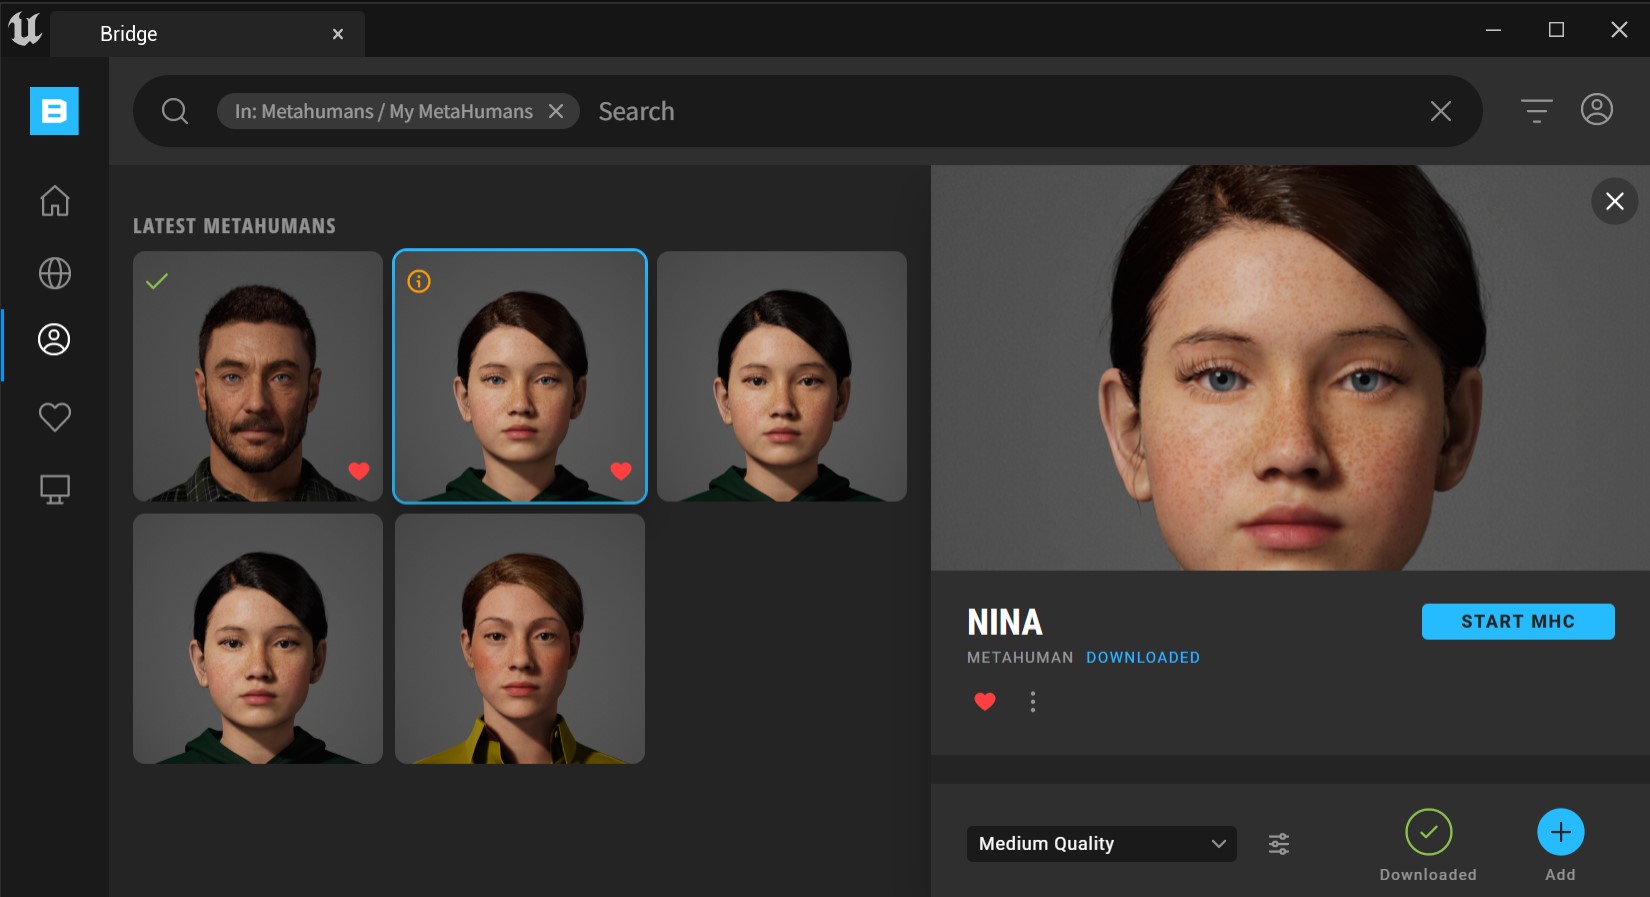
To import MetaHumans into Unreal, start by navigating to the Content Browser and clicking on the ‘Add’ button. In the drop-down list, select ‘Add Quixel Content’, which should be the third option. Log in to your Quixel account and locate the MetaHuman section.
From there, you can select the MetaHuman you wish to import, choose the quality level, and initiate the download process. That, depending on the quality level and file size of the MetaHuman, download process may take some time. Additionally, once imported into Unreal Engine, you may need to make some adjustments to optimize the character’s performance in your project. Finally, press the ‘Add’ button to import the MetaHuman model into the scene.
Initially, during the import process, I encountered several issues, which required troubleshooting.
Issue – Download keeps restarting
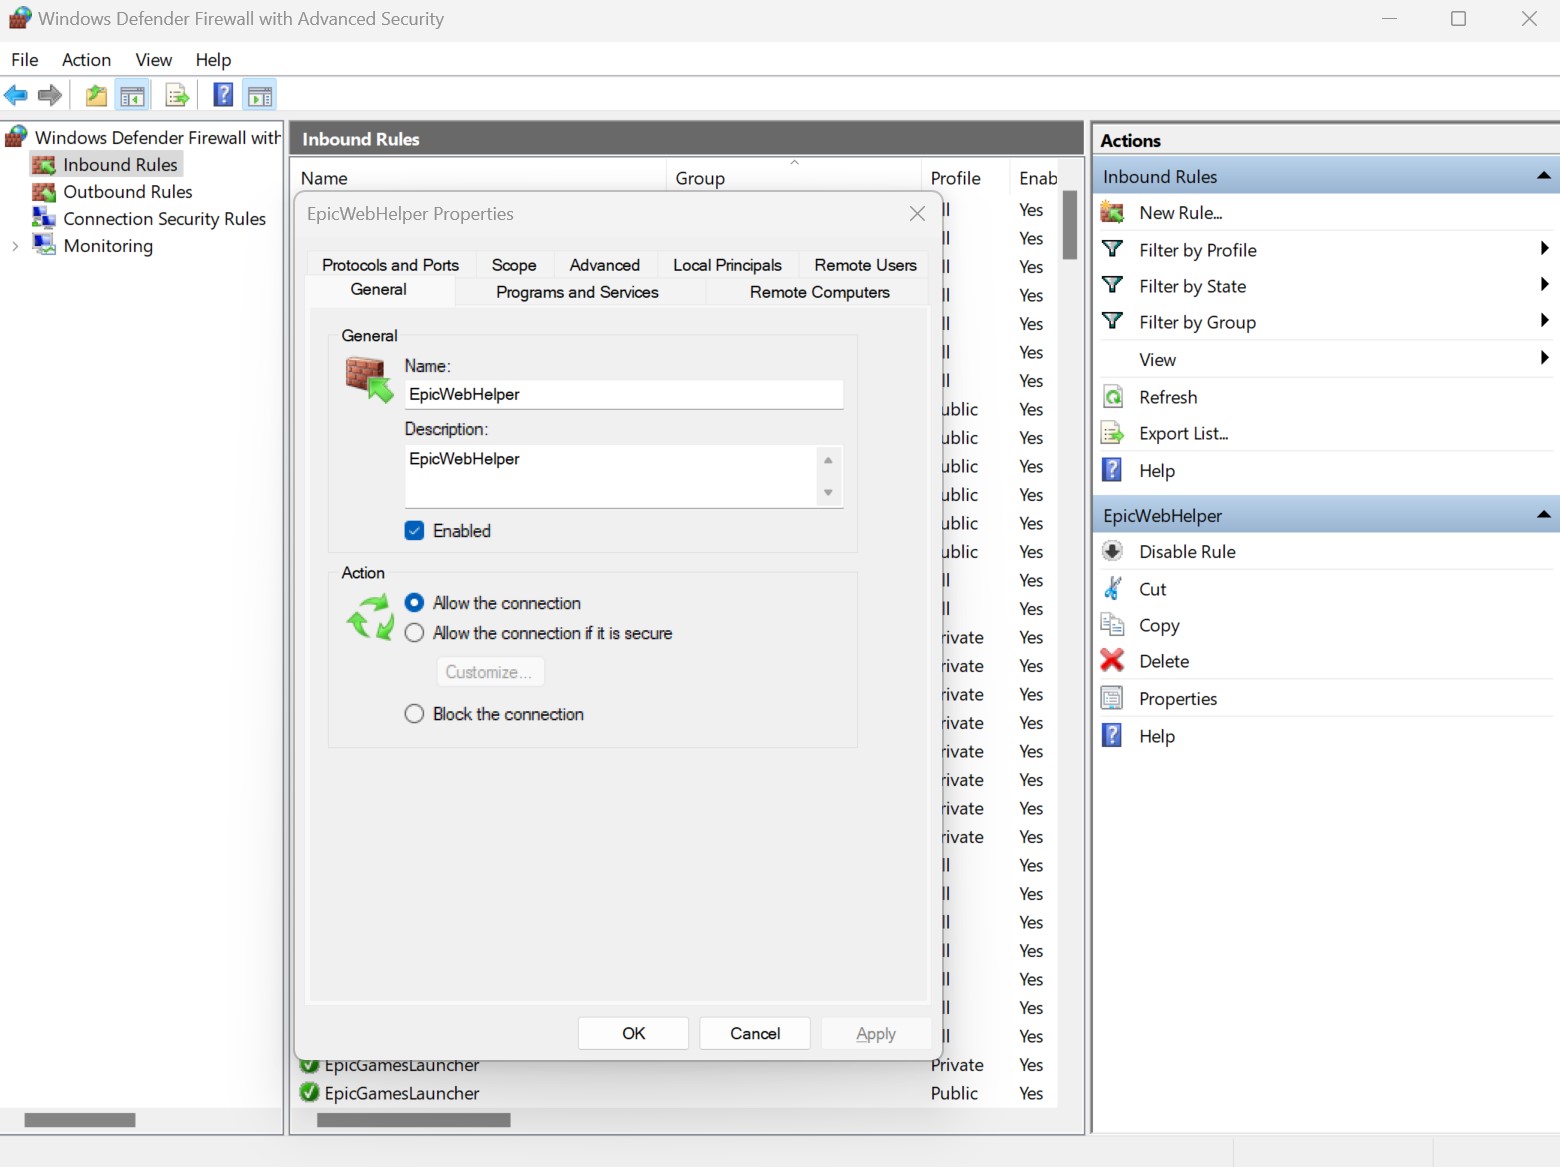
While attempting to import a MetaHuman into Unreal Engine version 5.0.3, we discovered a known issue for the Bridge plug-in where it continually restarts the download process without a successful import.
However, the problem can be solved by granting EpicGame extensions access through the firewall settings. The following procedure applies to Windows computers; for Mac OS, the process is similar but with different settings. To give EpicGame access through Windows Firewall settings, navigate to the firewall & network protection panel through the Windows start menu, and go to ‘advanced settings’. Allow Windows security to make changes to your device, so a new window pops up. Navigate to ‘inbound rules’ to locate every instance of the ‘EpicGamesLauncher’ and ‘EpicWebHelper’ rule items. Then, toggle the ‘Allow connection’ setting in the pop-out window to permit access.

Issue - Unresponsive 'Add' button
Issue – Unresponsive ‘Add’ button
If the “add” button fails to respond, it may be necessary to close Bridge and reload the Unreal file. After closing and reopening the Unreal scene, the materials needed some time to recompile. However, the metahuman was successfully imported and located in the Unreal file in the folder ‘Content > Metahumans’.
With the successful import of the Metahuman, we proceeded to the next step: integrating it into our project to create a playable character.
Making Nina a playable character
Scene setup
In our project, we are employing the base of Unreal Engine’s native third-person blueprint.
GameMode
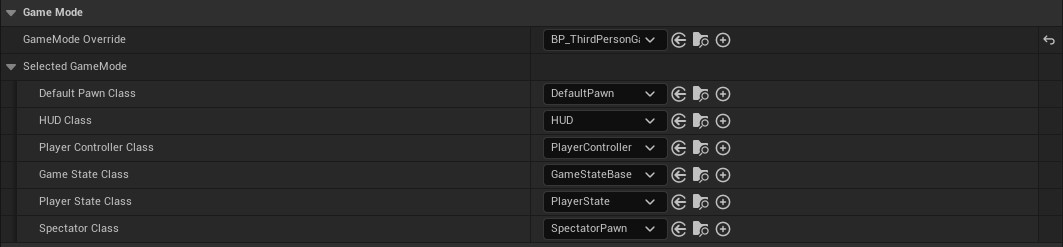
In the world settings of our project, I have assigned BP_ThirdPersonGameMode in the gameMode override. Additionally, I assigned a player controller to the player controller class to eliminate pawn-generating related errors.
Setting up the third-person character blueprint
To properly set up the Metahuman character, navigate to the Metahumans folder and locate the blueprint with the character’s name (e.g. BP_Nina). From there, access the class settings and change the parent class to BP_Third Person Character. Next, select the ‘body’ component and drag it under ‘mesh’. The additional root component can then be deleted, and the location and rotation values should be reset to default.
In the variables section, locate ‘RetargetModeEnabled’ and enable the checkbox under the default value. Then, navigate to the mesh section and uncheck the visibility option. Under optimization, find ‘Visibility based anim tick option’ and change it to ‘Always tick pose and refresh bones’.
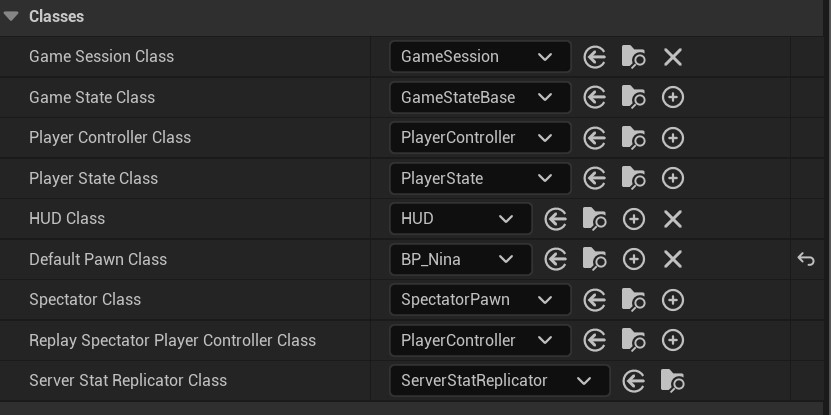
Once these steps are completed, insert the blueprint into the world settings under the selected gameMode and assign it as the default pawn class in the third-person blueprint. Note that warnings may appear regarding unknown axes and actions, which can be addressed by assigning them in the project settings, discussed in the following section.
Keyboard input
To enable the movement of the character in-game using the WASD or arrow keys, some setup is required in the project settings. To do this, navigate to ‘Engine > Input’ and locate the ‘Bindings’ section. From there, configure the axis and action mappings as needed.
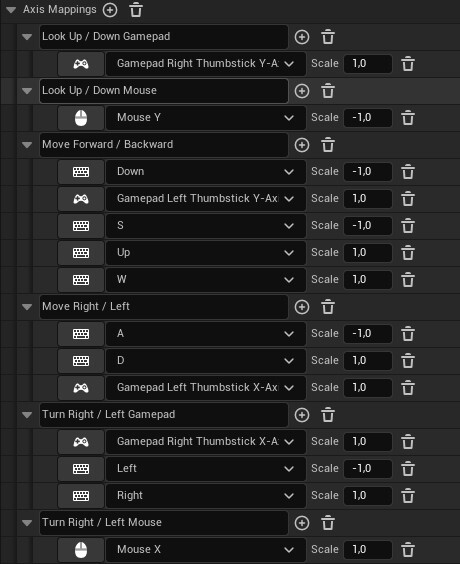
To configure the axis mappings, you will need to locate the relevant events beginning with ‘InputAxis’ in the third-person character blueprint. These event names will need to be filled in under the ‘Axis Mappings’ section. By clicking on the plus icon, you can fill in the required axis mappings (e.g., Move Right/Left). Respectively, the same goes for locating the events beginning with ‘InputAction’ and filling them in under ‘Action mapping’.
When assigning the key values, be sure to specify positive and negative scales for left/right and up/down movements. To move left and down, assign a value of -1, and for right and up movements, assign a value of +1. This will ensure that the character moves in the desired direction when the corresponding keys are pressed. By configuring the axis mappings correctly, we can enable smooth and intuitive movement for our playable character.

Applying animations : retargeting
Upon clicking on the play button, the character can move and follow the native unreal cycles of the skeletal mesh ‘SKM_Quinn’.
However, our character appeared somewhat distorted due to differences in height compared to the Unreal mannequin. To ensure seamless integration of animations while maintaining a polished appearance for the metahuman character, retargeting of IK and FK rig poses are essential.
Retargeting animations in Unreal Engine 5 involves using two IK rig blueprints and one IK Retargeter blueprint.
Lining up the hierarchy of the IK rig blueprints
In order to set up the retargeting process, we require both a target rig and a source rig.
1. The target rig is the skeletal mesh or character to which the animation will be applied to. When importing a Metahuman, this target rig IK is already included by default, eliminating the need to create it from scratch. The target rig’s name may vary depending on the selected body type, such as ‘f_med_nrw_body’ in our case.
2. A source rig represents the character or skeletal mesh that the animation was created for. In this case, the SMK_Quinn Skeletal mesh is used as the source rig. This skeleton does not provide an IK rig blueprint by default, hence we had to create one for it.
To ensure successful retargeting, the source – and target skeletal meshes must have a similar hierarchy. If they don’t, you can use the retarget manager to map the bones from one mesh to the other. In this case, the source skeletal mesh and target skeletal mesh have different base rigs, so the Unreal IK rig blueprint we created had to align with the Metahuman IK rig blueprint as closely as possible.
Creating the Unreal IK rig
First, we assigned a retarget root to the unreal rig that was similar to the one in the metahuman rig, by right-clicking on the pelvis bone and designating it as the retarget root.
After, we created all of the retarget chains, following the hierarchy of the target rig.
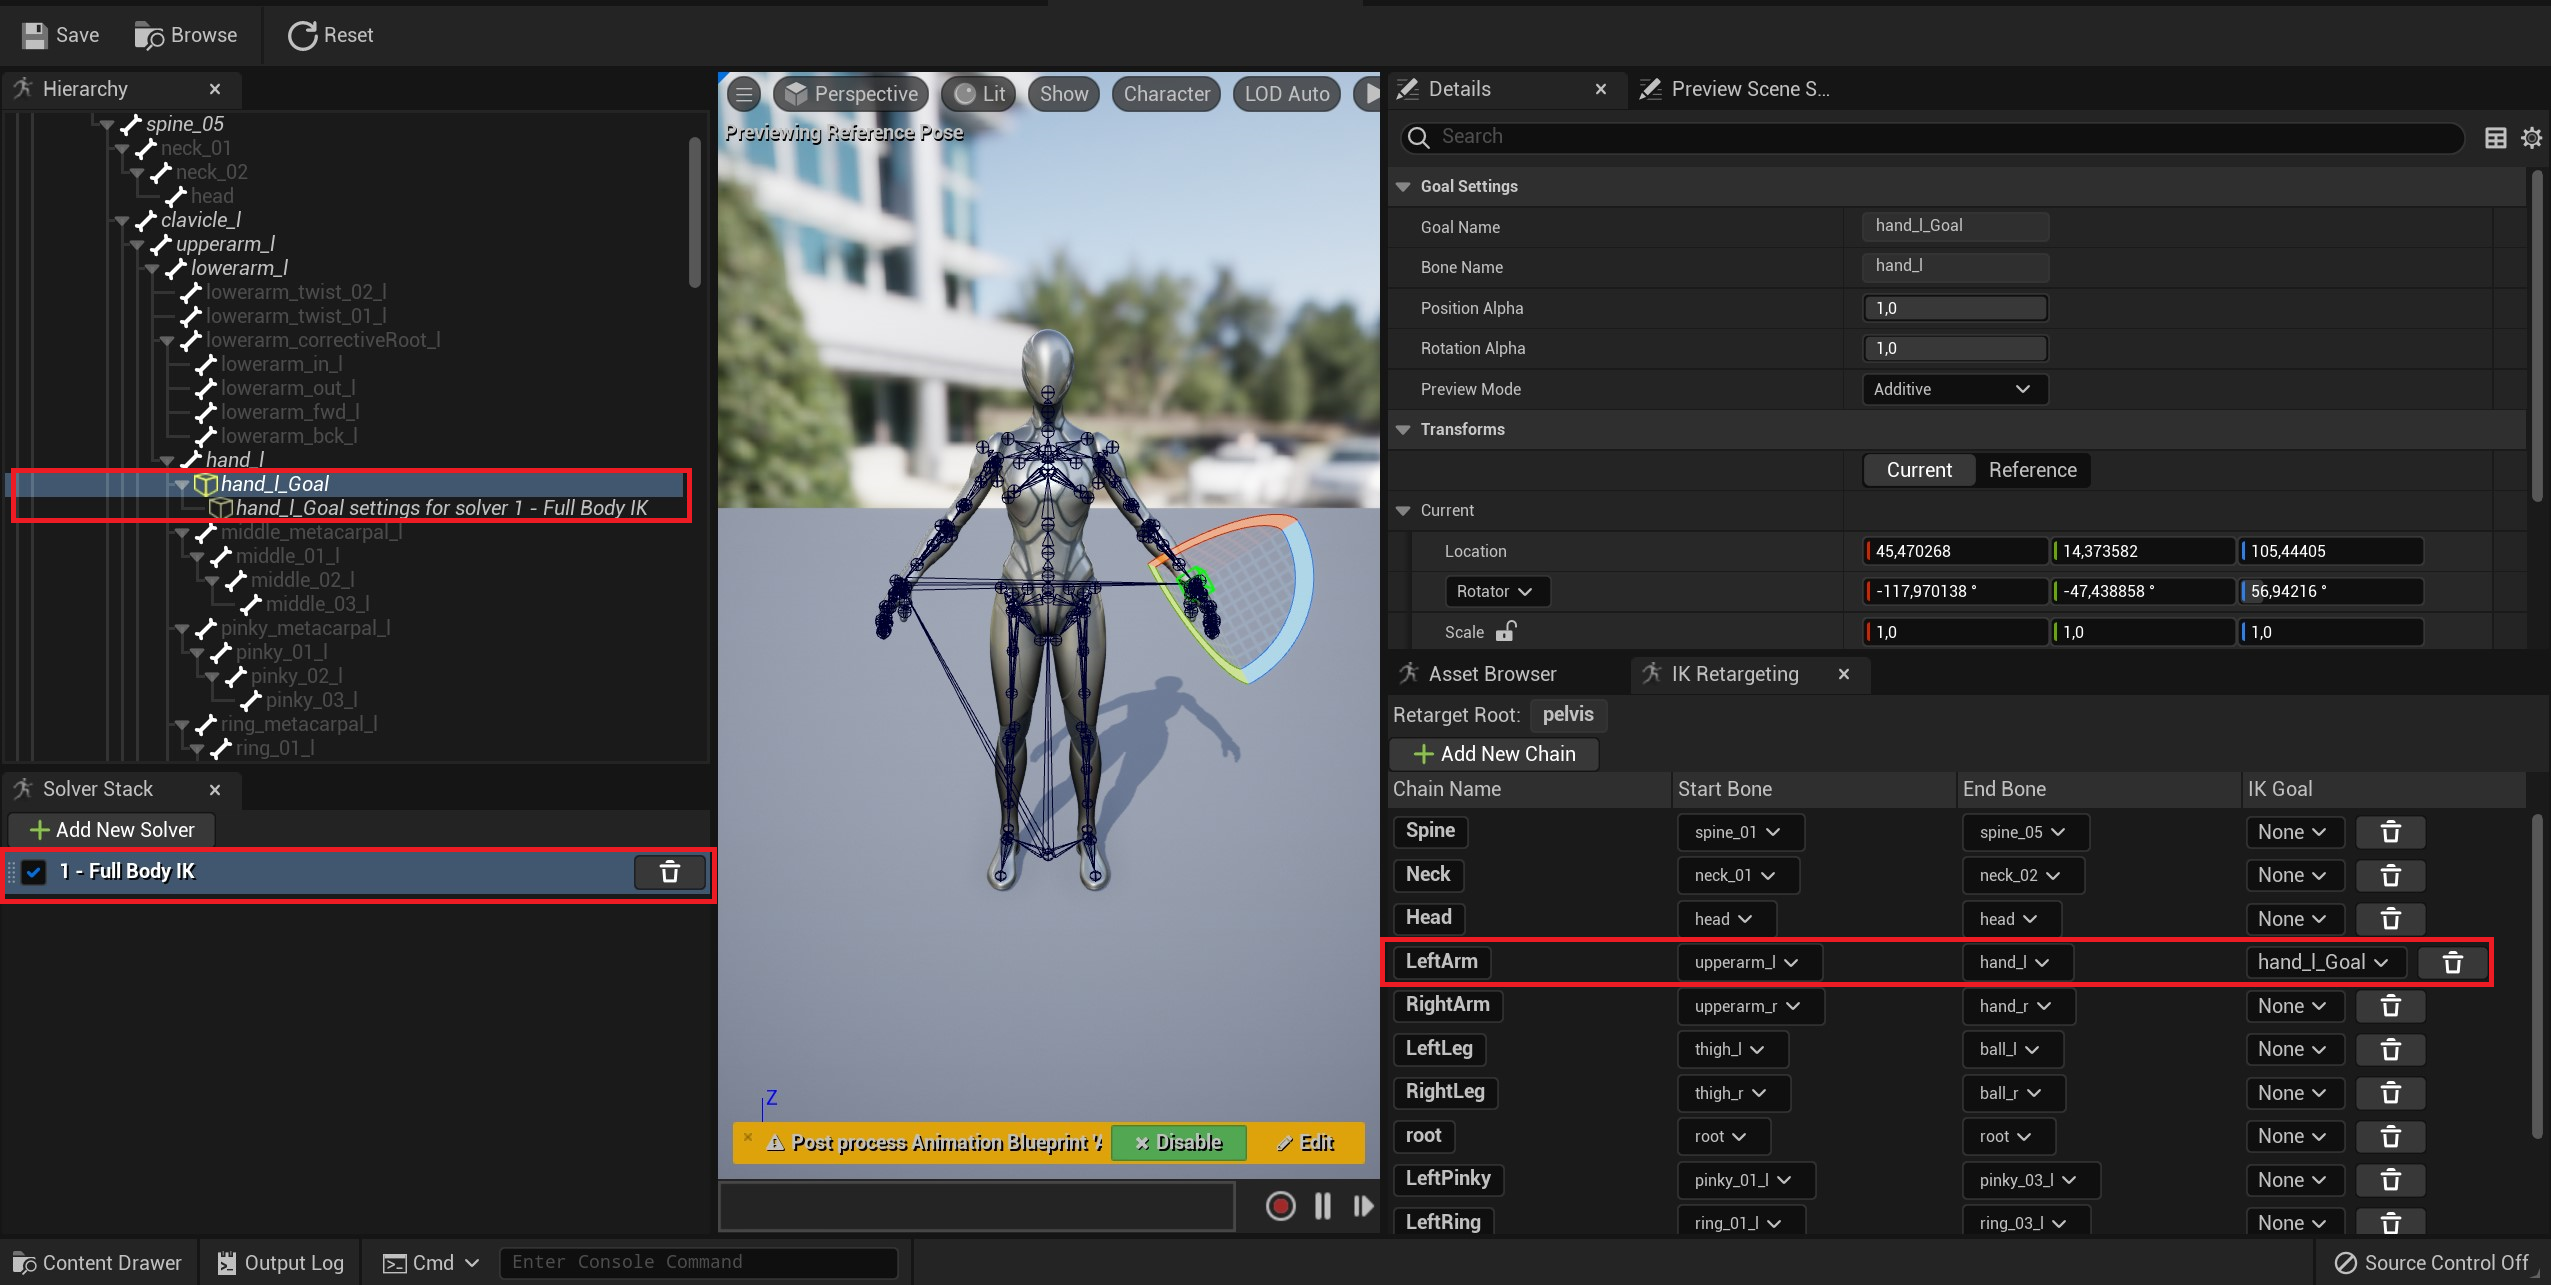
The next step was creating the IK goals. We used the full Body IK solver, with the pelvis as the root bone for this solver, which is the same as in the metahuman IK rig.
Once all the IK goals were assigned in the hierarchy, we also assigned them in the IK retargeting panel as an IK goal next to the correct chain name. In our case, we had four IK goals, including two for the feet and two for the hands.
IK retargeting
After aligning the skeletons, the next step was to utilize a retargeting system to effectively map the animation data. This involved the creation of an IK retargeting asset.
To begin, a new IK retargeting blueprint was created with the previously generated Unreal IK Rig blueprint designated as the source rig for copying animation. Subsequently, the Target IKRig asset (IK_metahuman) was assigned in the details panel.
Next, a crucial step in this process was to ensure that the source chains were correctly applied in the chain mapping. Incorrectly assigning some source chains could lead to weird artifacts in the animations, making this step especially important.
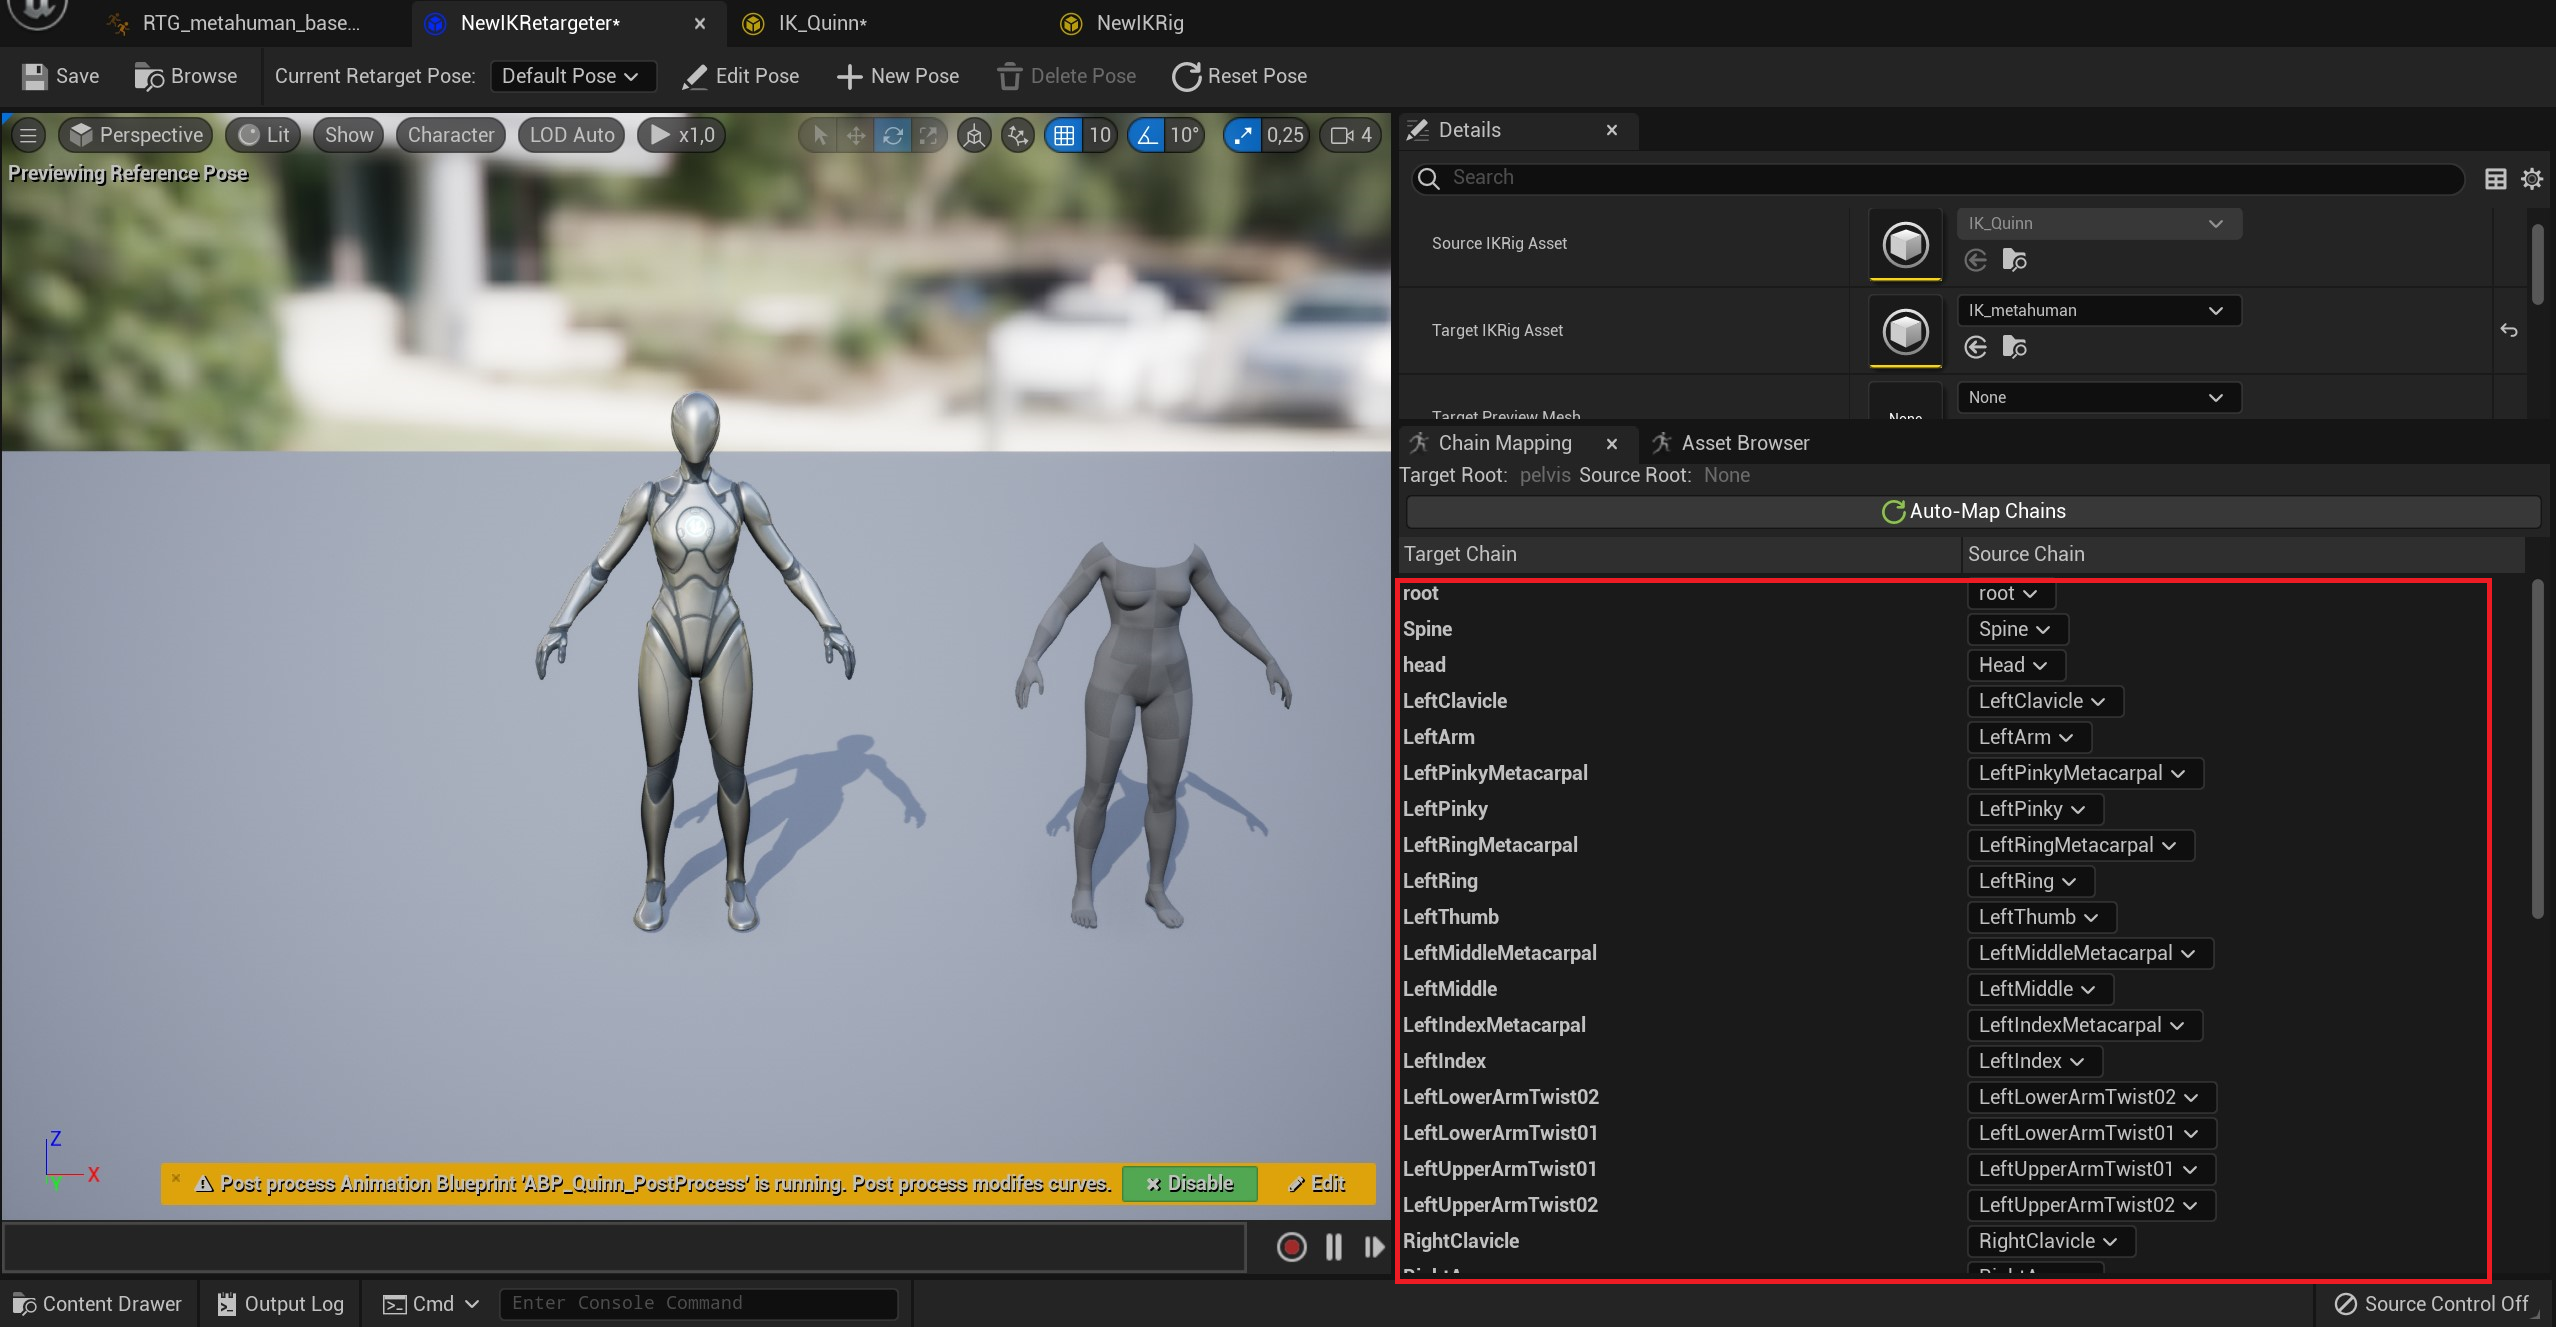
(above you see bad vs well applied source chains)
After completing the IK retargeting process, the next step was to go back to the BP_Nina blueprint and locate the LiveRetargetSetup function. Within this function, there’s a node that refers to ‘RTG_metahuman_base_skel_AnimBP’, where when clicked on the ‘retarget pose from mesh’ in the animGraph, an IK retargeter asset is referenced. This one was then replaced by the one we just created.
By now, we were able to implement a Metahuman character in Unreal Engine 5 as a playable
character, which is a solid base for adding more functionality.

Using a different rig as a playable character
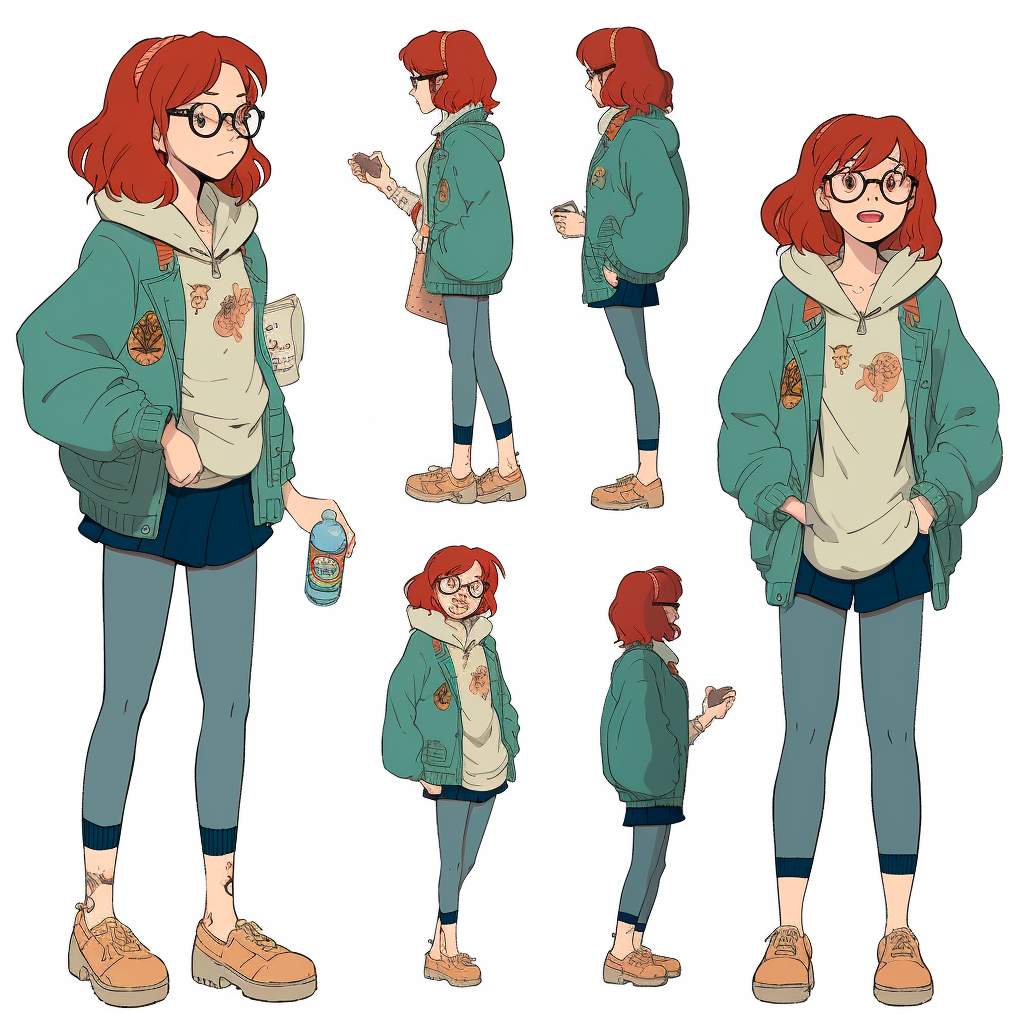
As we explored different options for bringing our new style (above) to life, we realised that using the Metahuman rig might not be the optimal choice.
Although it offers advanced mechanics and materials, its primary focus is to generate a realistic look. Achieving a stylized appearance using this rig could require significant extra time and effort, compared to starting from scratch with a simpler rig.
However, the knowledge we gained from implementing Metahuman characters as playable characters in UE5 remains highly valuable as the process for importing a custom rig is very similar, and it’s even more straightforward with a simpler rig.
In the meantime, we will keep looking for Nina!
 English
 Español